Table of Contents
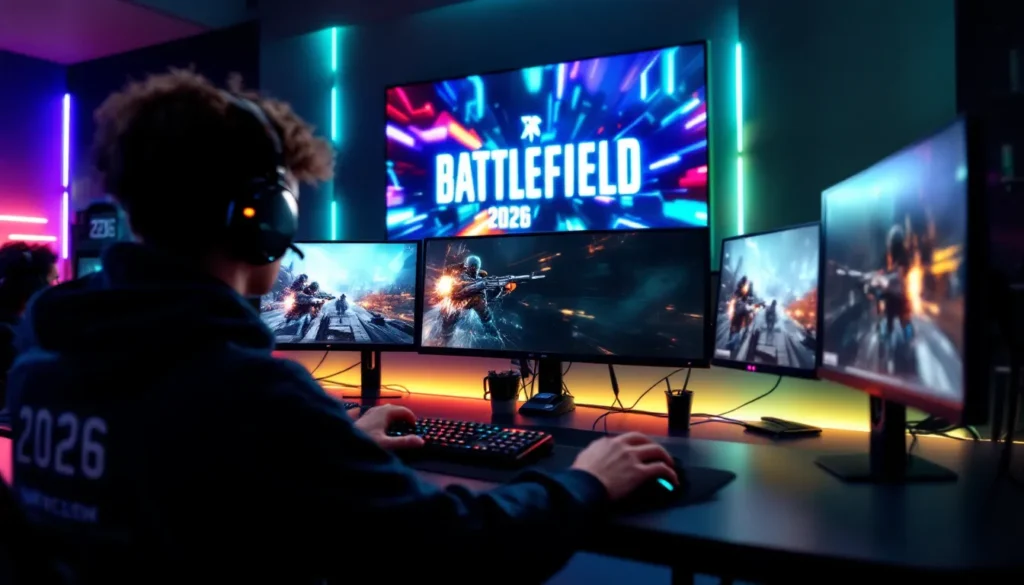
ToggleBattlefield 4 still stands as one of the most weapon-rich first-person shooters ever created, and with the right knowledge, you can dominate any server. Whether you’re grinding through multiplayer matches or just trying to improve your K/D ratio, understanding the arsenal at your disposal separates casual players from the ones who consistently land top scoreboard positions. The weapon meta in BF4 has remained surprisingly stable even a decade after launch, some guns are simply more effective than others, and that’s not opinion, it’s data. This guide breaks down every primary weapon class, optimal attachments, and loadout strategies that actually work in 2026. You’ll learn why certain weapons dominate specific playstyles, how to customize them for maximum effectiveness, and which guns pair best with your preferred role on the map.
Key Takeaways
- Master your chosen Battlefield 4 weapon class deeply rather than chasing the statistically best gun—familiarity and positioning matter more than equipment stats.
- Assault rifles dominate BF4’s meta because they balance firepower, accuracy, and handling to perform competently at all engagement ranges without hard-locking you into one playstyle.
- SMGs and shotguns require strict positioning discipline; these specialist weapons aren’t weaker, they’re engagement-range-dependent and devastate opponents when used in their optimal zones.
- Choose your Battlefield 4 loadout based on two factors: your in-game role (rushing, defending, or balanced play) and the specific map’s engagement distances—operation Locker favors SMGs while Caspian Border demands sniper rifles.
- Attachments like Angled Foregrips and Muzzle Brakes refine weapon performance, but they’re secondary to mastering fundamentals; superior positioning and aim beat perfect optic selection every time.
- Adapt your loadouts to map conditions rather than stubbornly specializing in one weapon; successful players rotate their arsenal strategically and understand why their choices match their circumstances.
Understanding Battlefield 4’s Weapon System
Battlefield 4’s weapon system operates on straightforward mechanics that reward familiarity and smart customization. Each weapon class, assault rifles, carbines, SMGs, shotguns, sniper rifles, and LMGs, fills a specific role and excels within defined engagement ranges. The game doesn’t arbitrarily favor any single gun: instead, it balances firepower, accuracy, rate of fire, and handling to create distinct tradeoffs.
TTK (time-to-kill) is your north star stat. A weapon with a 300 millisecond TTK will drop enemies faster than one needing 400ms, all else equal. This matters tremendously in close-quarters firefights where reaction time and weapon efficiency determine survival. Recoil patterns, bullet spread, and magazine capacity round out the core mechanics you need to master. Unlike modern Call of Duty titles, BF4 demands controlled bursts and positioning, spray-and-pray only works at extreme close range.
The attachment system gives you meaningful customization without overwhelming choice paralysis. You’re limited to one optic, one barrel attachment, one grip/rail, and sometimes a laser or flash hider. This constraint forces real decisions: you can’t be optimal at every range simultaneously. Every loadout represents a compromise: do you want maximum accuracy or faster ADS? Better hip-fire or more stability? These decisions shape how you’ll perform in specific scenarios.
Assault Rifles: Versatile Mid-Range Dominators
Assault rifles are the backbone of BF4’s multiplayer ecosystem. They offer solid damage, manageable recoil, and enough magazine capacity to engage multiple enemies without reloading. Most assault rifles deliver consistent performance from 20 to 60 meters, making them the safest pick for players who haven’t yet defined their playstyle.
Top Assault Rifle Picks and Their Strengths
The AK-12 sits at the top tier for pure damage output. With 34 damage per shot and a 700 RPM fire rate, it kills in roughly four shots at range. The tradeoff? Vertical recoil demands attention, especially in sustained fire. Pair it with the Angled Foregrip, an 8x scope, and a Compensator to control that climb.
The M16A4 bursts fire only, which sounds limiting until you realize three-round bursts delete enemies at medium range with laser precision. Each burst lands clean if you pace shots correctly. This gun rewards discipline and punishes spray-and-pray habits. Equip the Stubby Grip for better hip-fire and the ACOG scope for balanced engagement ranges.
The SCAR-H excels in longer-range duels. Its 45 damage per shot means fewer bullets to drop targets, and its lower 650 RPM fire rate feels more controllable than 900+ RPM alternatives. You’ll lose close-quarters speed, but dominate anyone peeking windows or crossing open ground.
For aggressive players pushing flags and holding choke points, the ACE 23 is your weapon. It combines solid damage (28 per shot), a fast 900 RPM rate, and forgiving recoil characteristics. The meta players lean on this gun because it performs adequately everywhere without excelling nowhere. That versatility matters in dynamic firefights where you won’t know engagement distance until bullets start flying.
Attachment recommendations vary by rifle, but the pattern holds: stabilize your weapon for mid-range work with a Compensator or Muzzle Brake, mount a Holographic or ACOG scope for speed combined with clarity, and grab an Angled Foregrip to control recoil while maintaining ADS speed. In chaotic environments like Operation Locker, swap the scope for Iron Sights to boost close-range speed.
Carbines: Close-Quarters Flexibility
Carbines split the difference between assault rifles and submachine guns. They handle reasonably well in close quarters while maintaining more mid-range punch than SMGs. If you’re moving between objective points and never quite know whether you’ll face enemies at 15 meters or 40 meters, a carbine keeps you combat-ready for both scenarios.
The ACE 52 CQB delivers carbine damage (28-30 per shot depending on range) with a generous 770 RPM fire rate. Its recoil climbs predictably, making it controllable for players with decent mouse control. This is your entry point if you’re transitioning from assault rifles and want something that still rewards accuracy.
The M4A1 serves aggressive assaulters who spend more time fighting than looting ammo crates. Its 25 damage per shot and 800 RPM rate compensate for reduced one-shot power. Pair it with a Laser Sight and Kobra Red Dot for lightning-fast close-range engagements. You won’t win sniper duels, but you’ll dominate flag captures.
The SG 553 LB bridges carbines and assault rifles, it shoots slower (652 RPM) but hits harder (32 damage). High-skill players who maintain distance discipline use this to control territory and punish position mistakes. The drawback? You can’t out-spray an SMG user rushing your position, so play smart.
Carbines excel on maps with mixed engagement distances: Flood Zone’s balance of tight warehouse sections and open exterior areas, or Siege of Shanghai where rooftop angles clash with building interiors. They’re optimal for squad-focused gameplay where you’re rarely alone and can rely on teammates to suppress threats while you reposition.
Submachine Guns: Speed and Close-Range Firepower
SMGs reign supreme in tight quarters. If your playstyle involves rushing objectives, holding hallways, and thriving on aggressive positioning, SMGs transform you into a lethal close-range specialist. These weapons combine high fire rates (800-1100 RPM), fast handling speeds, and rapid TTK that devastates enemies before they react.
The PP-2000 hits harder than most SMGs at 25 damage per round, and its 1150 RPM rate is the fastest in class. This means three-shot kills at close range, essentially a hitscan weapon in practical terms. Attach a Laser Sight and Reflex Sight, keep your ADS sensitivity high, and rush into server’s main objective. You’ll die occasionally, but you’ll secure far more kills than deaths.
The UMP45 takes the opposite approach: lower fire rate (600 RPM) but each shot hits for 26 damage. This weapon forgives missed shots better than the PP-2000 because you don’t need precision bursts. New players transitioning to SMGs typically perform better with the UMP because its slower rate of fire lets them track targets more naturally.
For players who split time between medium and close ranges, the PDW-R offers balanced stats: 23 damage, 900 RPM, and manageable recoil. It’s not exceptional at anything, but it never embarrasses you either. Think of it as the assault rifle of SMGs, competent everywhere without specializing anywhere.
SMG strategy hinges on positioning. You can’t engage assaulters at 60 meters and expect wins: instead, control maps’ vertical space and tight corridors where your fire rate advantage overwhelms. On Golmud Railway, camp the tunnels. On Caspian Border, hold the radio tower interior. You’re trading one-on-one versatility for team utility by removing threats from the spawns and objective zones where your allies need breathing room.
Shotguns: Aggressive Playstyle Essentials
Shotguns occupy a unique niche: they’re feast-or-famine weapons that either eliminate targets instantly or leave you vulnerable to counterattack. There’s no middle ground. A shotgun user winning a fight has killed in one or two shots: a shotgun user losing a fight either whiffed their pellets or mis-ranged the engagement and paid dearly.
The SASG-12 semi-auto shotgun rewards precision. Each pellet spread contains more damage per shot than pump-action alternatives, and you can fire rapidly if your aim stays true. On maps like Operation Locker where hallways funnel players into predictable kill zones, the SASG-12 becomes oppressive, you’ll fire three shots in the time a pump-action user fires one.
The 870 MCS pump-action demands accuracy but delivers reliability. One well-placed shot eliminates most infantry: two shots guarantee the kill regardless of range (within shotgun effective distance). The reload is glacially slow, so missing is genuinely punishing. This gun appeals to players confident in their positioning and aim, you commit to every engagement knowing missing costs lives.
The M1014 auto-shotgun sits between SASG-12 and 870 MCS. Its semi-auto fire rate (200 RPM) feels snappier than pump-action but less rapid than the SASG-12. It’s forgiving for newer shotgun players because you can fire multiple shots quickly enough to handle slight misalignment.
Shotgun loadouts typically skip optics entirely, stick Iron Sights on them and attach a Laser Sight for devastating hip-fire accuracy. A Choke barrel tightens your pellet spread for longer effective range. Play defensively around cover, prefire corners expecting enemies, and never venture into open space. Shotgunners who win consistently understand they’re 1v1 specialists in confined spaces, not solo warriors conquering maps. Coordinate with teammates who can suppress threats at distance while you control close-range engagements.
Sniper Rifles: Long-Range Precision Weapons
Sniper rifles demand investment, they require position awareness, map knowledge, and disciplined shooting. You won’t rack up killstreaks against moving targets in open space. Instead, you’ll eliminate threats before they threaten your team, control sightlines that otherwise allow enemies free passage, and provide fire support that teammates can rely on.
The M98B dominates sniper rifle rankings. At 80 damage per shot, it kills with a single body shot up to medium range: at longer distances, it’s a guaranteed one-shot kill to the torso. The 7.62mm ammunition hits hard, and the bolt-action cycle time feels responsive. Attach a 40x scope for extreme-range work or an 8x scope if you’re holding closer lanes.
The JNG-90 matches the M98B’s damage but cycles slightly faster (though the difference is negligible). It’s arguably more aesthetically preferred by elite sniper players, but mechanically they’re nearly identical. Use whichever you’re more comfortable with: sniping consistency comes from practice, not pixel-perfect stat advantages.
For aggressive snipers who transition to mid-range engagements, the SV-98 offers lower damage (70 per shot, requiring two shots at distance) but snappier handling and faster reload. You’ll struggle against distant stationary targets, but you’re more dangerous against moving enemies or those who push your position. This weapon suits aggressive map control over defensive perimeter defense.
Sniper strategy: identify high-traffic routes enemies must cross (bridge approaches, objective lanes, spawn-to-objective pathways). Set up sightlines covering those routes and fire disciplined shots at stationary or predictable targets. Every shot must count because reloads leave you vulnerable. Play with headsets, teammates calling out enemy positions let you prefire common approach angles. On maps like Caspian Border and Golmud Railway where sightlines extend across the map, a single sniper eliminates multiple enemies before they realize where fire originates. That’s your value: psychological pressure and map control through raw threat.
Light Machine Guns: Suppressing Fire Support
LMGs trade mobility for firepower and magazine capacity. You’re hauling massive ammo pools and slower ADS speeds in exchange for suppressing fire that keeps enemies pinned. These weapons shine in organized squad play where teammates capitalize on the pressure you create.
The M27 IAR sits at the intersection of assault rifles and LMGs. It handles like an AR with 28 damage per shot and 800 RPM, but carries 100-round magazines. You’re not fully committing to suppression: instead, you’re maintaining constant offensive pressure without frequent reloads. Newer players often prefer the M27 because it doesn’t penalize aggressive play with crippling mobility loss.
The U-100 MK4 is a proper LMG: 25 damage per shot, 770 RPM, and 200-round belt magazines. The reload is lengthy, so you rarely swap weapons mid-fight. Position yourself covering objective zones or squad spawn areas, and unleash suppressing fire that forces enemies into cover. Your teammates capitalize by advancing through the chaos you’ve created.
The AWS hybrid weapon fires in bursts rather than full-auto, splitting the difference between precision and volume. It’s unconventional but rewarding for players who favor controlled bursts. Each shot lands cleaner than full-auto spray, and you burn fewer rounds achieving the same suppression.
LMG loadout philosophy: mount a Bipod under your barrel, this dramatically reduces recoil when you’re mounted against cover. Attach a Reflex Sight or Holographic for quick target acquisition. Find lanes where enemies funnel through (chokepoints, objective lanes) and lock those areas down. Your K/D ratio might suffer because suppression doesn’t guarantee kills, but your team’s objective capture rate will skyrocket. Play squad-focused roles rather than solo fragging, that’s where LMG value manifests.
Pistols and Secondary Weapons: Reliable Backups
Pistols serve as emergency options when your primary runs dry or you’re caught in unexpected close-quarters situations. Most BF4 pistols feel underwhelming for primary weapons but provide crucial insurance against weapon-swap timing errors.
The M1911 is your reliable standby. It kills in two-three shots with straightforward handling. Nothing fancy, but nothing embarrassing either. Pair it with a Laser Sight to boost hip-fire accuracy and you’ve got a solid backup that won’t disappoint when you’re desperate.
The Deagle (Desert Eagle) hits harder, two guaranteed body shots at any range, but slower reload and fewer ammo reserves make it risky as a primary weapon. Skilled players use it as a “what if I miss” failsafe, knowing two well-placed shots recover from mistakes.
The P226 offers fastest fire rate among pistols, sacrificing some per-shot damage for quantity. It’s useful when you’re caught out without your primary and need rapid shots to supplement, but it still loses to properly equipped primary weapons in head-to-head duels.
Pistol strategy is straightforward: don’t rely on them. Use pistols to finish damaged enemies, engage threats while your primary reloads, or finish wounded targets during objective captures. A good primary weapon loadout rarely forces pistol reliance, so invest energy optimizing your main gun rather than agonizing over secondary options. That said, attaching a Laser Sight universally improves all pistols’ hip-fire consistency, giving you better odds if you’re truly desperate.
Attachments and Customization: Optimizing Your Arsenal
Attachments transform weapon characteristics without requiring new guns entirely. A single barrel choice or grip can shift a weapon from medium-range accurate to close-range mobile. Understanding attachments separates casual players experimenting with presets from optimized operators maximizing their setup.
Scopes and Optics for Every Engagement Range
Your optic choice defines engagement comfort. Iron Sights offer fastest ADS speeds and no glint that reveals your position to distant enemies. They’re clunky at range but unmatched for aggressive play where ADS delay matters. Reflex Sight and Holographic provide minimal zoom and quick target acquisition, ideal for CQB weapons like SMGs and shotguns.
ACOG (4x scope) serves versatile mid-range work. You’re magnified enough to hit distant targets but not so zoomed that close-quarters usage suffers. It’s the default choice for assault rifle builds that need to function anywhere. 8x scope extends effective range dramatically, favored by snipers and long-range specialists.
High-magnification scopes (PKA-S, 40x PU-Scope) introduce scope glint, enemies at distance see your lens shine, pinpointing your location. This tradeoff matters hugely: you’re trading concealment for zoom. Only use extreme magnification if you’re confident enemies won’t converge on your position.
Barrels, Grips, and Stability Enhancements
Muzzle Brake and Compensator both reduce vertical recoil, critical for sustained fire or longer-range accuracy. The Compensator pulls slightly harder: the Muzzle Brake is gentler but still effective. Pick whichever your weapon’s recoil pattern demands.
Flash Hider reduces muzzle flash without controlling recoil. It’s niche, only use it if you’re holding positions where suppressive fire matters more than controlling spray, or if your weapon’s recoil is already manageable.
Grips offer specialized benefits: Angled Foregrip boosts ADS speed and recoil control simultaneously, it’s the most universally useful grip. Vertical Grip maximizes vertical recoil reduction at the cost of ADS speed, favored by stationary support players. Stubby Grip prioritizes hip-fire accuracy and ADS speed, ideal for aggressive close-quarters builds.
Laser Sight dramatically improves hip-fire accuracy and ADS speed but creates visible laser dot visible to enemies. It’s invaluable for SMGs and shotguns, useful for aggressive assault rifle builds, risky for precision weapons where you’re predictable. Tactical Light brightens dark areas and can disorient enemies but reveals your position. Skip it unless you’re defending dark corridors.
Bipod deserves special mention. When deployed against cover, it reduces your weapon’s vertical and horizontal recoil dramatically. LMGs and precision-focused builds gain massive accuracy advantages. Set-and-forget playstyles (snipers, support LMG users) benefit most.
Building Winning Loadouts for Different Playstyles
Loadout theory flows from simple principle: optimize your weapon to excel in your intended role, accept limitations, and position accordingly.
Aggressive Rushing Loadouts
Aggressive players thrive in close-quarters chaos where reaction time and firepower dominate. Your loadout prioritizes fast ADS, high fire rate, and mobility.
Rushing Assault Loadout:
- Weapon: M16A4 (burst fire forces controlled aggression)
- Optic: Reflex Sight or Iron Sights (minimal ADS penalty)
- Grip: Angled Foregrip (ADS speed and recoil control)
- Barrel: Muzzle Brake (vertical recoil management)
- Secondary: M1911 (reliable backup)
Rushing SMG Loadout:
- Weapon: PP-2000 (highest DPS in close quarters)
- Optic: Reflex Sight (quick target acquisition)
- Grip: Stubby Grip (hip-fire accuracy bonus)
- Attachment: Laser Sight (devastating hip-fire)
- Secondary: Deagle (powerful finishing weapon)
These loadouts sacrifice long-range capability accepting you’ll avoid open-ground firefights. You operate inside buildings, through objective zones, and along chokepoints. Teammates covering distance work with you, they suppress distant threats while you secure close-range safety.
Balanced All-Purpose Loadouts
Balanced players prefer flexibility. Your loadout performs adequately everywhere without dominating anywhere. You win engagements through smart positioning rather than relying on weapon supremacy.
Balanced Assault Loadout:
- Weapon: ACE 23 (versatile stats, minimal drawbacks)
- Optic: ACOG 4x (medium-range clarity without extreme zoom)
- Grip: Angled Foregrip (speed and stability)
- Barrel: Compensator (recoil management)
- Secondary: M1911 (reliable backup)
Balanced Carbine Loadout:
- Weapon: ACE 52 CQB (carbine flexibility)
- Optic: Holographic (balance of speed and zoom)
- Grip: Angled Foregrip (ADS boost)
- Barrel: Muzzle Brake (vertical recoil control)
- Secondary: M1911
Balanced loadouts suit squad play where you adapt to threats rather than specializing. You’re comfortable at any range against any threat, though you’ll rarely dominate specific situations. This playstyle excels on complex maps where threats approach from multiple angles and engagement distances vary minute-to-minute.
Defensive and Support Loadouts
Defensive players hold territory, control zones, and punish aggressive advances. Your loadout prioritizes stability, ammunition capacity, and sustained fire over mobility.
LMG Support Loadout:
- Weapon: U-100 MK4 (suppressing capacity)
- Optic: ACOG 4x (medium-range coverage)
- Grip: Vertical Grip (maximum recoil control)
- Barrel: Bipod (mounted accuracy)
- Secondary: M1911
Sniper Defensive Loadout:
- Weapon: M98B (one-shot reliability)
- Optic: 8x scope (distance coverage)
- Barrel: Bipod (mounted deployment)
- Secondary: Deagle (finishing backup)
Defensive loadouts thrive when you’re holding objectives, defending flags, or covering high-traffic routes. You’re not pushing aggressively: you’re punishing enemies who push you. Mobility matters less because you’re stationary or moving deliberately. Fire discipline matters more, every shot counts because you’re engaging opponents from distance or prepared positions where accuracy matters.
Weapon Balancing Tips and Meta Strategies
BF4’s meta has stabilized over its lifetime, and certain weapons consistently outperform others. Understanding why helps you evaluate balance changes and adapt your strategy as patches shift the landscape.
The assault rifle class dominates because it’s balanced: not the absolute best at anything, but genuinely competitive everywhere. This makes them ideal for inconsistent players facing variable threats. If you don’t specialize, assault rifles are your safest bet. That doesn’t mean they’re broken, it means accessibility rewards competent fundamentals.
Specialist weapons (SMGs, sniper rifles, shotguns) demand positioning discipline. A sniper positioned poorly dies to rushers: a shotgunner caught in open space loses to assaulters. These weapons aren’t weaker, they’re position-dependent. Players mastering them consistently outfrag versatile assaulters by understanding optimal engagement ranges and never fighting outside their weapon’s strength zones.
Recent patch philosophy has avoided dramatic balance shifts. DICE primarily addresses glaring issues rather than chasing meta trends. This stability means recommendations from 2024 largely hold in 2026. That said, weapon balance shifts occasionally occur, so stay alert to patch notes when updates deploy. A single “recoil reduction” or “damage increase” can reshape optimal loadouts.
Meta progression looks like this: casual players gravitate toward stable, forgiving weapons (ACE 23, M16A4). As skill improves, specialists adopt niche weapons with higher skill ceilings (PP-2000, M98B). Competitive players theorize micro-advantages and tweak attachments constantly. You’re progressing naturally by learning your weapon inside-out, not by chasing “best gun” claims without context. The meta within your playstyle matters more than overall meta rankings.
Choosing the Right Weapon for Your Role and Map
Optimal weapon selection depends on two factors: your in-game role and the specific map’s engagement patterns.
Consider your role first. If you’re primarily capturing flags and pushing objectives, aggressive weapons (SMGs, burst assault rifles) enable faster kills in tight flag zones. If you’re defending established positions, stable weapons with larger magazines (LMGs, precise assault rifles) maximize sustained fire. If you’re actively hunting opponents away from objectives, flexible weapons (carbines, balanced assault rifles) let you adapt to unexpected encounters. Each role has optimal weapons: forcing the same loadout across all roles handicaps performance.
Map design then refines weapon selection. Operation Locker features tight corridors and CQB engagements, SMGs and shotguns shine. Caspian Border emphasizes long sightlines and position control, sniper rifles and LMGs dominate. Golmud Railway mixes objective zones with open terrain, assault rifles and carbines handle versatility demands. Paracel Storm’s naval focus creates mid-range boat-to-boat encounters, assault rifles and carbines perform adequately. Study a map, identify engagement distances, and select weapons matching those ranges.
Within Battlefield Gameplay: Master, experienced players develop map-specific loadouts. They might carry SMGs for Operation Locker but switch to assault rifles for Golmud Railway, even if assault rifles aren’t their preferred weapon class. This adaptability matters more than one-gun mastery, a competent player adjusting to map conditions outperforms a specialist forcing their niche weapon onto mismatched terrain.
Server population affects strategy too. Crowded 64-player servers favor close-quarters weapons because engagements cluster around objectives and natural funnel points. Smaller 32-player servers create sparser engagement patterns favoring medium-range weapons where spacing increases. High-ticket hardcore modes punishing mistakes favor precision weapons: low-skill-floor casual servers favor forgiving weapons like assault rifles.
Weapon variety within the Battlefield Archives demonstrates successful players rotate loadouts strategically. They’re not stubborn “I only use SMGs” purists: they’re pragmatists optimizing for circumstances. Study successful players, understand their weapon choices, and adopt their reasoning rather than copying their exact loadout. Your playstyle might demand different weapons even for identical map roles.
Conclusion
Battlefield 4’s weapon arsenal rewards understanding over memorization. You don’t need to master every gun, you need to deeply understand your chosen weapons and how their strengths match your playstyle and the map’s demands. An SMG expert dominating Operation Locker is equally skilled as an assault rifle generalist succeeding across diverse maps: they’ve simply specialized differently.
Start by choosing a weapon class matching your playstyle: aggressive players gravitate toward SMGs, methodical players prefer assault rifles, aggressive defenders choose shotguns, and patient players master sniper rifles. Spend dozens of matches with your chosen weapon, learning its recoil pattern, effective ranges, and optimal attachment combinations. This familiarity translates directly to performance. Generic advice about “best guns” without context is less valuable than deep understanding of your personal weapon.
Attachments matter, but they’re secondary to fundamentals. Perfect optic selection doesn’t compensate for poor positioning or underdeveloped aim. Master positioning first, know where to stand to engage enemies at your weapon’s optimal range. Attachment optimization follows naturally as you identify specific recoil or handling limitations your weapon exhibits during actual gameplay.
Monitor patch notes when updates deploy. BF4’s balance hasn’t shifted dramatically, but occasional tweaks occur. A damage adjustment or recoil change might obsolete your favorite loadout, requiring adaptation. Community resources like Game8 maintain updated tier lists tracking meta shifts and providing perspective on weapon balance changes.
Join communities discussing Twinfinite guides and Game Rant features exploring deeper strategy. These platforms aggregate competitive perspectives, tournament loadouts, and meta analysis. Absorbing diverse viewpoints accelerates your understanding faster than solo experimentation.
Eventually, the “best” weapon is the one you’re comfortable with in situations you encounter most frequently. Master that weapon, understand its limitations, position accordingly, and win through superior knowledge and execution rather than relying on statistically superior hardware. That’s how Battlefield 4 players dominate in 2026, not by chasing balance patches, but by deeply understanding their arsenal and using that knowledge to consistently outplay opponents.