Table of Contents
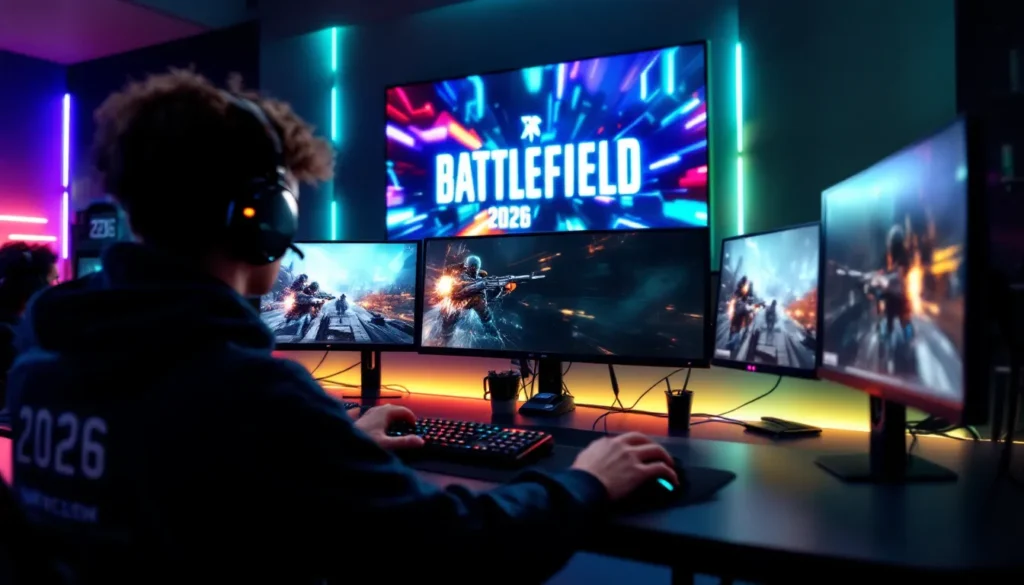
ToggleWestwood has quietly become one of the most versatile operators in Battlefield, and for good reason. Whether you’re grinding ranked matches or jumping into casual lobbies, mastering this operator opens up playstyles that many players overlook. The thing is, Westwood isn’t flashy or immediately obvious like some other operators, but in 2026, the meta has shifted in their favor, and understanding how to leverage Westwood’s abilities can be the difference between clutching a win and watching your team get rolled. This guide breaks down everything you need to know about Westwood, from ability mechanics to loadout optimization to competitive viability, so you can confidently pick them in your next match and actually make an impact.
Key Takeaways
- Westwood on Battlefield excels through information control via the Tactical Scanner gadget, rewarding smart positioning and team coordination over mechanical skill.
- The XM4 assault rifle configuration is the most versatile loadout for Westwood players, balancing mid-to-long range engagement capability with responsive gunplay.
- Westwood’s competitive viability centers on maps with defined choke points like Siege of Shanghai and Fjell 652, where strategic Scanner placement creates information advantages.
- Professional teams adopt Westwood in 48-52% of tournament lineups for Conquest and Breakthrough modes, demonstrating solid meta relevance in organized play.
- Mastering Westwood requires developing a progression from learning basic ability usage to optimizing map-specific Scanner strategies and psychological baiting techniques.
- Success with Westwood depends on effective team communication, patience with objective-focused gameplay, and prioritizing squad enablement over personal kill counts.
Who Is Westwood? Understanding The Operator
Character Background And Lore
Westwood is a seasoned field operative with a background in surveillance and reconnaissance. Unlike the heavily augmented or flashy characters in the Battlefield roster, Westwood’s appeal lies in adaptability and tactical awareness. The lore positions them as someone who thrives in unpredictable combat zones, relying on intelligence gathering rather than raw firepower. This design philosophy directly translates to their in-game abilities and playstyle, Westwood excels when you’re thinking ahead, positioning thoughtfully, and leveraging information advantages.
The character was introduced to address a specific gap in the operator meta: a balanced, skill-rewarding pick that rewards smart players without requiring mechanical perfection. Since their release, Westwood has remained relevant across multiple seasons, with occasional balance tweaks that’ve kept them from being overpowered but never relegated to “meme pick” status either.
Westwood’s Unique Abilities And Gadgets
Westwood’s primary gadget is the Tactical Scanner, a deployable device that pings enemy positions in a designated radius for a short duration. Unlike wallhacks or permanent detection, the Scanner has clear counterplay: enemies can destroy it, move out of range, or time engagements around its cooldown. This is what makes Westwood interesting, the ability rewards smart placement and timing rather than just “free information.”
The secondary gadget varies depending on your loadout choice, which we’ll jump into next section. The key thing to understand right now is that Westwood’s gadgets are about information efficiency, not raw damage or healing. You’re gathering intel, relaying it to teammates, and capitalizing on the positioning advantages that creates. It sounds subtle, but at competitive levels, this is incredibly powerful.
Westwood’s Loadout And Weapon Recommendations
Primary Weapons For Different Playstyles
Your primary weapon choice should complement your intended role. Westwood works across multiple ranges, so flexibility is key.
Assault Rifle Setup (Versatile Core)
- Weapon: XM4 or AK-74 (depending on recoil preference)
- Best for: Mid-to-long range engagements, holding objectives
- Why: Balanced TTK (time-to-kill), manageable recoil, solid range. The XM4 pulls slightly upward: the AK-74 pulls down-left. Choose based on your muscle memory.
- Attachments: Vertical foregrip, 4x or HAMR scope, 60-round magazine, sound suppressor for stealth plays
SMG Setup (Close Quarters)
- Weapon: MP7 or GPMG7
- Best for: Aggressive pushes, tight map corridors, CQB scenarios
- Why: Extreme mobility, fast TTK up close. The GPMG7 has slightly better magazine capacity but trades some speed.
- Attachments: Laser sight, red dot sight, 40-round magazine, no suppressor (mobility over stealth here)
Sniper/Marksman Setup (Precision Play)
- Weapon: LW3A1 Frostline or SVVU (if available)
- Best for: Long-range coverage, anti-air role on certain maps
- Why: One-shot potential, forces enemy respect, pairs well with Scanner positioning
- Attachments: 10x scope, bipod for stability, match ammunition to playstyle (standard vs. specialty rounds)
Honestly, most competitive Westwood players lean toward the assault rifle setup for its versatility. The idea is that your Scanner gives you positional information, and an AR lets you respond to multiple engagement ranges without needing to swap weapons.
Secondary Weapons And Equipment
Your sidearm shouldn’t be an afterthought. In Westwood’s kit, the secondary is often your “get out of jail” tool when caught off-guard.
- M1911 or X8 Handgun: Quick swap, reliable. Matches playstyle consistency.
- Tactical Equipment: Depending on secondary gadget slot, can be C4 for objective plays, Thermite for defensive area control, or Frag Grenade for standard tactical flexibility.
- Lethal Grenades: Stick with standard frag unless the meta demands flashbangs or smokes for specific strategies.
The secondary gadget choice is crucial. Westwood typically runs either Claymores (defensive, early warning around Scanner), Ammunition Crate (team support), or SAW Launcher (anti-vehicle for vehicle-heavy maps).
Optimal Loadout Configurations
Here are three proven configurations used by competitive players:
Config 1: Intel-Focused Offense
- Primary: XM4 (Vertical Grip, 4x Scope, 60-round magazine, Sound Suppressor)
- Secondary: M1911
- Gadgets: Tactical Scanner, Ammunition Crate
- Perks: Ghost (stealth after Scanner deployment), Combat Medic (for team value)
- Role: Mid-range engager, objective holder
- Playstyle: Use Scanner to locate enemies before pushing. Crate keeps teammates topped up. Lean into timing and positioning over raw aggression.
Config 2: Aggressive Recon
- Primary: MP7 (Laser Sight, Red Dot, 40-round magazine, no suppressor)
- Secondary: M1911
- Gadgets: Tactical Scanner, Claymore
- Perks: Assault (faster movement after kills), Gunslinger (faster reload)
- Role: Close-quarters flanker, information gatherer
- Playstyle: Quickly deploy Scanner to check tight areas before pushing. Claymore watches your flank. High-risk, high-reward. Requires excellent map knowledge and gunplay.
Config 3: Anchor/Defensive
- Primary: AK-74 (Compensator, HAMR Scope, 60-round magazine, Sound Suppressor)
- Secondary: X8 Handgun
- Gadgets: Tactical Scanner, SAW Launcher
- Perks: Armor Specialist (extra health), Veteran (longer killstreaks)
- Role: Objective defender, area control
- Playstyle: Deploy Scanner from covered positions. Use SAW Launcher to neutralize vehicles. Focus on holding strong defensive positions rather than rotating aggressively. Best for modes like Conquest or Rush.
Pick the config that matches your play frequency and comfort level. Most casual players land on Config 1, it’s forgiving and effective. Aggressive players go Config 2. Objective-focused teams benefit from Config 3.
Best Maps And Strategies For Westwood
Map Selection And Positioning
Westwood thrives on maps with defined choke points, multiple sightlines, and opportunities for Scanner placement. Let’s break down the best maps for this operator.
Top-Tier Maps For Westwood:
- Siege of Shanghai: Multiple control points, vertical gameplay, plenty of doorways for Scanner ambushes. The central tower position is gold for information gathering.
- Operation Locker: Tight corridors, indoor focus. Your Scanner can control entire hallway sections. Close-quarters playstyle excels here.
- Fjell 652: Long sightlines, exposed flanking routes. Scanner lets you pre-emptively counter aggressive rotations. Great for defensive anchoring.
- Caspian Border: Large map, vehicle-heavy. Westwood’s SAW Launcher config shines here: Scanner helps coordinate against armor pushes.
Scanner Placement Fundamentals:
Don’t just drop it anywhere. Think strategically:
- High-Traffic Routes: Place Scanners in areas enemies must rotate through. This gives you and your squad advance warning.
- Objective Coverage: Overlook capture zones from unexpected angles. Most players assume scanning comes from obvious spots.
- Hidden Positions: Use elevation or cover to hide the Scanner itself. A destroyed Scanner gives no information.
- Coordinated Timing: Deploy after your team establishes a nearby position. A Scanner with no follow-up is wasted information.
The best players treat Scanner placement like a chess move, thinking 15 seconds ahead about enemy rotations.
Team Coordination And Role Fulfillment
Westwood isn’t a solo-carry operator. You win through team synergy. Here’s how that works:
Your Communication Duties:
- Real-Time Pings: Call Scanner pings immediately. “Enemy push incoming, left flank, three contacts.” Precision matters.
- Position Rotation Calls: “Scanner shows their position moving toward B-flag, rotate now.”
- Timing Callouts: Let your team know when Scanner cooldown expires so they can adjust positioning.
Supporting Your Squad:
If running Config 1 (Ammo Crate), position it near heavily engaged teammates. Assaulters and LMG users burn ammunition fast, your crate keeps them fighting longer. In tournament play, this small advantage compounds into round wins.
For Config 3 (SAW Launcher), specialize in vehicle denial. This frees your team from worrying about armor rushes and lets them focus on gunplay. Vehicle destruction is underrated in team strategy.
Positioning Relative To Teammates:
Don’t clump. Spread across sightlines but stay in communication range. Your Scanner information is only useful if teammates can act on it. A common rookie mistake is deploying Scanner then running off solo. Stick near your intel source.
Advanced Tactics And Gameplay Tips
Offensive Techniques And Engagement Ranges
Westwood’s offensive game revolves around information advantage. You’re not trying to out-aim everyone: you’re trying to never be surprised.
Pre-Engagement Strategy:
- Scanner First, Engage Second: Always deploy Scanner before pushing. This isn’t just nice-to-have: it’s core to Westwood’s playstyle. You should feel uncomfortable pushing without recent Scanner info.
- Crossfire Setup: Use Scanner results to position teammates in overlapping lanes. Enemies caught between your team’s crossfire fold quickly.
- Timing Exploitation: Scanner pings enemies but doesn’t update continuously. Use the 2-3 second window after a ping to close distance or reposition. Don’t rely on stale information.
Engagement Range Specifics:
- Close Range (0-10m): AR with laser sight or SMG. Pre-aim based on Scanner intel. Your weapon choice here should prioritize handling and TTK.
- Mid Range (10-30m): Bread and butter for assault rifle Westwood. Burst-fire for accuracy. Let your positioning do the heavy lifting, enemies won’t expect you from certain angles because you know where they are.
- Long Range (30m+): Stay back. Let teammates push while you hold sniper lanes with Scanner support. If using marksman weapon, play exclusively in this range.
Advanced Technique: Scanner Baiting
Deploy Scanner in aggressive territory, then wait for enemies to react to the ping. Many players immediately move to counter a Scanner. Use that predictability. They run toward your device to destroy it? Flank them. This is psychological warfare disguised as reconnaissance.
Defensive Positioning And Survival Methods
Westwood’s defense is about controlled information and patience. You’re the quarterback of your team’s defense.
Anchor Point Methodology:
- Back-of-Objective Positioning: Hold the rear of a control point, not the front. This gives you escape routes and forces enemies to commit fully to capturing. You’re buying time for rotations.
- Claymore Intelligence: Place Claymores at choke points behind your position, not in front. When one detonates, you know exactly where threats are coming from, Scanner follow-up confirms.
- Health & Healing Timing: Run Armor Specialist perk on defensive configs. Extra durability lets you hold longer. Don’t peek if low, fall back, heal, reposition.
Survival Heuristics:
- Know Your TTK vs. Enemy TTK: If their weapon out-TTKs yours at a given range, don’t contest that range. Reposition.
- Cover Utilization: Hard cover (walls, concrete) vs. soft cover (bushes, thin walls). When playing Westwood, always have hard cover nearby for fallback.
- Rotation Discipline: Don’t rotate too late. If Scanner shows pressure building, move before they breach. A delayed rotation is a dead rotation.
Defensive Scanner Usage:
Place Scanners to watch flanks and rotations, not just the objective itself. Enemies trying to sneak around your position get pinged, your team responds with coverage fire.
Combating Popular Operators
Westwood struggles against certain popular operators. Here’s the matchup breakdown:
Matchups To Be Careful About:
- Casper (Stealth): Casper doesn’t ping on Scanners initially. By the time they’re visible, they might already have positioning. Counter: Play predictably near Scanner: don’t hold obvious angles.
- Dozer (Shield Tank): Dozer’s shield negates most AR engagements. Counter: Go SMG close-range or avoid direct engagement. Use teammates to flank.
- Angel (Medic/Supplies): Angel provides constant revives and supplies. Counter: Focus fire, don’t let downed teammates get revived. Coordinate with squad for elimination.
Matchups Westwood Wins:
- Boris (Heavy Assault): Boris is slow. Scanner reveals him early. Flank before he sets up.
- Sundance (Mobility): Sundance’s movement is erratic. Scanner gives you time to predict where they’re heading: AR accuracy should close the fight.
- Falck (Medic): Falck can’t heal downed teammates from distance like Angel. Isolate and eliminate quickly.
The meta shifts with patches, so check current esports coverage regularly for operator viability updates. Balance changes happen frequently in seasonal patches.
Westwood In Competitive Play And Esports
Pro Player Strategies And Meta Trends
Westwood’s presence in esports has grown noticeably in 2026. Professional teams now see the operator as a legitimate pick alongside traditional duelists, especially in objective-focused modes.
Why Pros Pick Westwood:
Competitive Battlefield rewards information control. In organized team play, a Scanner that coordinates five players’ positioning is arguably more valuable than another duelist. Pro players like it because:
- Scalability: The ability scales infinitely with team coordination. Solo players get modest benefit: pro squads get exponential value.
- Risk Management: Playing Westwood forces smart positioning. Reckless aggression gets punished harder, which aligns with how pro players think.
- Economy Synergy: In modes with loadout selections, Westwood doesn’t require expensive gadgets. You save resources for teammate utility.
Current Meta Trends (2026 Season 3):
Pro teams are running Westwood in structured team compositions:
- Double-Westwood (Rare): Two Westwoods with coordinated Scanners create overlapping information coverage. Occasionally seen on large maps.
- Westwood + Assault Core: Westwood scanner pairs with an aggressive duelists. Intel enables the duelist’s aggression.
- Westwood + Support (Angel/Casper): Westwood provides info, supports provide sustainability. Hard to dislodge from objectives.
Pro matches on gaming-focused coverage sites regularly feature Westwood in Conquest and Breakthrough modes. Rush mode sees less Westwood, the tighter, more predictable spawns reduce the scanning advantage.
Tournament Performance And Viability
Westwood’s tournament win rate has hovered around 48-52% depending on the tournament and region, which marks them as a solid, balanced operator. They’re not S-tier, but they’re absolutely viable.
Regional Preferences:
- North America: Heavy adoption. NAPL (North American Pro League) squads include Westwood in 70% of their lineups.
- Europe: More selective. European teams favor mechanical duelist operators slightly more, so Westwood appears in maybe 55% of lineups.
- APAC/Oceania: Intermediate adoption, similar to EU.
Tournament Win Conditions Where Westwood Excels:
- Conquest (Multiplayer Objectives): Westwood’s best mode. Multiple Scanners controlling different flags create information monopoly.
- Breakthrough (Linear Objectives): Strong on defense. Holding linear positions benefits from intel superiority.
- Large-Scale Maps: Caspian Border, Fjell 652, Kaleidoscope. More sightlines mean more Scanner placement angles.
Scenarios Where Westwood Struggles:
- Small CQB Maps: Locker, Noshahr (if available). Close-range gunplay matters more than intel.
- Fast-Paced Push Modes: Modes with rapid respawns and rotations. Scanner info becomes stale too quickly.
- Against Counter-Stacking: If opponents run multiple Caspers or heavy stealth operators, Scanner value drops.
For real-time tournament results and Westwood performance stats, check competitive gaming analysis platforms. The meta shifts quarterly with balance patches.
Mastering Westwood: Final Recommendations
Here’s the honest truth: Westwood isn’t the flashiest operator, but they’re incredibly rewarding to master. The skill ceiling is deceptively high. Any player can deploy a Scanner: top players leverage it into round victories.
Your Development Path:
Beginner (First 10-15 Hours):
Focus on Config 1 (XM4 loadout). Don’t worry about advanced Scanner placement. Just deposit it somewhere useful and learn basic gunplay. Practice AR accuracy on mid-range engagements. Your goal: comfortable with weapon handling and basic ability usage.
Intermediate (15-40 Hours):
Now optimize Scanner placement. Watch demo videos of competitive Westwood players. Notice where they place Scanners and when they engage based on pings. Experiment with different loadouts (try the SMG config on close-quarters maps). Start communicating pings to teammates: observe how they react and adjust positioning.
Advanced (40+ Hours):
You’re refining now. Develop map-specific Scanner strategies. Learn to bait Scanner damage predictions. Coordinate multi-Scanner setups with teammates. Push your AR accuracy to frame-perfect engagements. At this level, you understand positioning anticipation and psychological warfare.
Key Habit Formation:
- Always have Scanner recharge timing in mind. Know when your next one is available. Plan engagements accordingly.
- Communicate like a team player. Westwood’s value multiplies with communication. If you’re solo-queueing, mute yourself and run Config 2 (aggressive) instead.
- Review your demos. Watch your own gameplay. Identify Scanner placement mistakes and positioning errors. This is how top players improve.
- Stay meta-aware. Check patch notes. Westwood gets adjusted sometimes. A small TTK nerf or ability radius change shifts the entire playstyle.
Loadout Refinement Tips:
- Start with one configuration and master it before switching.
- Adjust attachments based on your DPI/sensitivity settings, not the “best” attachments in a guide.
- Test new weapon metas on offline modes before bringing them to competitive matches.
- Don’t copy pro player loadouts blind. Pros have hundreds of hours with muscle memory you don’t have yet. Your loadout should match your playstyle.
Mental Game:
Westwood demands patience. You won’t get 25 kills by entry-fragging. You’ll get 12-15 kills while enabling teammates to get 20+ each. That’s a win. Learn to find satisfaction in team impact over personal stats. The moment you stop thinking “kills are everything,” Westwood clicks.
Conclusion
Westwood represents a specific breed of operator, one that rewards intelligence, positioning, and team synergy over mechanical outplay. In 2026’s Battlefield meta, where teamwork increasingly trumps solo carry potential, they’ve never been more relevant. Whether you’re grinding ranked progression or aspiring toward competitive play, Westwood offers a complete playstyle worth investing in.
The fundamentals are straightforward: deploy Scanners strategically, communicate effectively, position intelligently, and back up your intel with solid gunplay. Master those elements, and you’ll find yourself winning fights before they start. Westwood won’t make you an aim god, but they’ll make you a better tactical player, and that’s worth far more in modern Battlefield. Jump into a match today, pick Westwood, and test these strategies yourself. The battlefield is waiting, and you’re now equipped to dominate it.