Table of Contents
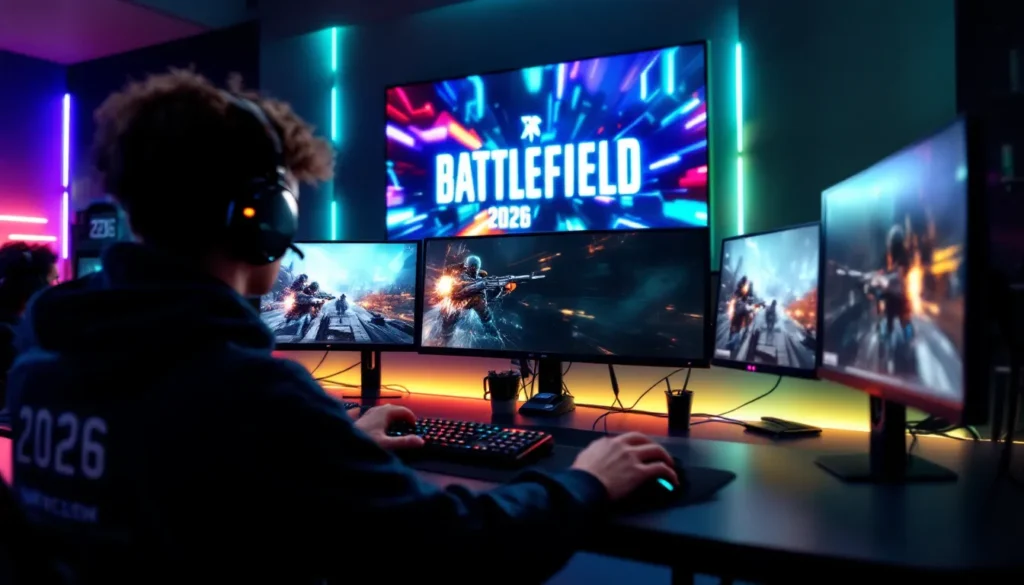
ToggleBattlefield 6 throws you into sprawling, dynamic combat zones where a single player can swing the momentum of an entire match, but only if you know what you’re doing. The class system sits at the heart of everything, determining your firepower, survivability, and ability to support the squad. Whether you’re a hardcore Conquest grinder or just diving into Battlefield for the first time, understanding the strengths and quirks of each specialist class is non-negotiable. In 2026, the meta has solidified, patches have tweaked ability cooldowns, and players have figured out what actually works. This guide breaks down all four classes, Assault, Support, Recon, and Engineer, with the exact loadouts and tactics pros are running right now. Stick around and you’ll walk away knowing not just which class fits your playstyle, but how to actually dominate with it.
Key Takeaways
- Battlefield 6 classes are built on four core specialists—Assault, Support, Recon, and Engineer—each with unique abilities that define squad roles and playstyle flexibility.
- Assault dominates close-quarters combat with self-heal and revive abilities, making it ideal for aggressive pushes and solo survivability in medium-range engagements.
- Support multiplies squad effectiveness by providing sustained ammo and armor resupply, turning flag holds and objective defense into wars of attrition your team can win.
- Recon excels at extreme range and information gathering, using drones to reveal enemy positions and enable coordinated plays, but struggles in close-quarters situations.
- Engineer is the only reliable vehicle counter with C4 and Sentry Gun deployment, becoming essential on vehicle-heavy maps like Breakthrough and large-scale Conquest areas.
- Competitive squads run one of each class (Assault, Support, Recon, Engineer) to cover every combat scenario, while Assault and Recon are safer solo picks in uncoordinated pub matches.
What Are Battlefield 6 Classes?
Battlefield 6 ditched the old rigid class system and went all-in on specialists, think of them as hybrid roles with unique gadgets and abilities that define how you play. Each specialist brings a specific strength to the squad: raw damage output, healing and ammo support, intel gathering, or vehicle destruction. The beauty is flexibility. You’re not locked into a single playstyle per match: specialists can swap loadouts and adapt to what your squad needs.
The four core specialists are Assault, Support, Recon, and Engineer. Each comes with a signature ability and corresponding gadget that synergizes with their role. Unlike older Battlefield titles, specialists don’t restrict which weapons you can equip, you can run an sniper rifle on Assault if that’s your jam, but your ability set is locked to your specialist choice. This creates interesting counterplay: knowing what specialist you’re facing means knowing what ability to expect.
Patch 2.2 (rolled out in early 2026) rebalanced cooldown timers for most specialist abilities, making them less spammable overall. This shift pushed the meta toward more thoughtful ability usage rather than constant rotations. The TTK (time to kill) remains competitive across all specialist types when armed properly, so your weapon choice and positioning matter just as much as your gadget.
The Assault Specialist
Assault is the heavyweight of Battlefield 6, built for aggressive pushes and dealing heavy damage in close-to-medium engagements. The signature ability is Defibrillators, letting you revive downed squad mates instantly while granting them a brief shield boost. It’s a game changer in tight squad play, a well-timed revive can turn a 1v4 into a 2v4 in seconds.
The Self-Heal Gadget rounds out the Assault package, giving you sustain that lets you hold positions longer than other specialists. Unlike Support’s group healing, Assault keeps the benefit to yourself, making this class ideal for solo player-oriented playstyles.
Assault shines in medium-range combat where you can leverage your mobility and ability to push hard without needing constant support. Think urban areas, building interiors, and tight chokepoints. You’ll struggle in long-range duels against Recon and Engineer setups, so know your engagement distances.
Why Choose Assault?
- Highest self-sustain in the game
- Revive ability enables aggressive squad play
- Strong in CQB and medium-range scenarios
- Best class for aggressive, momentum-based teams
Loadout Recommendations for Assault
For aggressive squad play, equip the AK-24 (assault rifle) paired with the 6x scope. The AK-24 sits at a 33ms TTK in optimal range, making it competitive at range while still shredding up close. Pair it with an MP7 or GPMG-7 as your secondary for times you’re caught indoors.
Attachment setup:
- Muzzle: Suppressor (radar denial on kills matters)
- Underbarrel: Vertical Grip (recoil control over everything)
- Optic: 6x Scope (versatility across range)
- Ammunition: Armor-Piercing Rounds (penetrates cover: helps against dug-in enemies)
For gadgets, stick with Defibrillators and Self-Heal. The throwables? Frag Grenades for area denial and the occasional cleanup kill. Throwback knife if you want a skill-check option, but frags are meta.
If you’re playing looser and more aggressive, swap the AK-24 for the M5A1 (high TTK penalty but better handling) and go full auto confidence. Keep the MP7 secondary: you’ll need it.
Secondary loadout (vehicle destruction flex): SG-550 (shotgun) + Gpmg-7 (light machine gun). Assault with a shotgun pressures enemies in confined spaces, elevators, rooms, trenches. The GPMG-7 gives you suppressive fire that keeps heads down while your squad maneuvers. This setup gets countered hard by Recon at range, so play around corners and cover, not open fields.
The Support Specialist
Support is the backbone of squad sustainability, trading personal firepower for the ability to keep your team alive, armed, and aggressive. The signature ability, Supply Drop, delivers ammo and armor plates directly to your squad, a tactical nuke in drawn-out fights because teams that don’t run out of ammo don’t lose momentum.
The Ammo Box Gadget lets you drop points of resupply that teammates grab passively. It’s less flashy than the supply drop but more consistent: teammates will swing by and keep topping off. In Conquest especially, holding a flag with ammo support nearby is brutal for the enemy to overcome.
Support weapons trend toward medium-to-long range since you’re not expected to be a lone-wolf fragger. LMGs (light machine guns) and assault rifles dominate the Support meta. You’re effective but less explosive than Assault. Your value multiplies with squad size, a solo Support is underwhelming, but a Support covering three aggressive teammates becomes the most influential player on the map.
Why Choose Support?
- Supplies enable extended engagements without base retreats
- High damage potential with proper weapon selection
- Turns good squads into dominant ones
- Excels in Conquest and objective-hold modes
Loadout Recommendations for Support
Run the LMGM249 paired with either an MP7 or M9 pistol. The M249 has massive magazine capacity (200 rounds) and steady DPS that suppresses grouped enemies. Attach a Reflex Sight (fast target acquisition), Vertical Grip (recoil), and Extended Mag (stay in the fight longer).
Want tighter accuracy? Swap the M249 for the LW3A1 (sniper rifle, yes, Support can run this). The LW3A1 at 150m+ becomes a one-shot kill machine, perfect if you’re playing with a more passive, defensive squad. Pair it with the M9 pistol for emergency close-quarters moments.
Gadget combo: Supply Drop as your main ability, Ammo Box as your gadget. Throw Frag Grenades to soften grouped enemies. This setup demands positioning near teammates, stay back-to-mid in the engagement, never pushing solo.
Alternative (vehicle-focused Support): Swap the M249 for the M5A1 (assault rifle) and equip C4 instead of the Ammo Box. This turns you into a versatile fighter who can transition quickly to destroying enemy vehicles and fortifications. You lose pure ammo support but gain explosive utility.
Thrown explosives: Stick with Frag Grenades for reliability, or run Incendiary Grenades if the enemy is camping buildings, forcing them to move breaks defensive setups.
The Recon Specialist
Recon is the intel-gathering, long-range damage specialist. The Drone ability deploys a scanning device that reveals enemy positions through walls, turning your teammates into informed hunters. The real value isn’t the drone itself, it’s the extended sightlines and callouts your squad gets from the intel.
Secondary gadget options include the Insertion Beacon (deploy teammate spawns for aggressive flanks) or Motion Sensor (passive enemy detection in a radius). These gadgets turn Recon into a force multiplier: with an insertion beacon, your squad suddenly has mobility your opponent doesn’t anticipate.
Recon excels at range where its sniper rifles and marksman rifles dominate. The LW3A1 one-taps at distance, and the DM7 provides precision burst damage without the cumbersome charge time. Where Assault struggles in open fields, Recon hunts.
Note: in early 2026 patches, drone scanning was nerfed to 3 seconds duration (down from 5), pushing Recon players to use drones strategically rather than spam them constantly. This made manual positioning and crossfire setups matter more.
Why Choose Recon?
- Only class with wall-hacks via drone intel
- Dominates extreme ranges (100m+)
- Enables squad coordination through intel
- Weakest in CQB: requires smart positioning
- Best for patient, map-aware players
Loadout Recommendations for Recon
Long-range purist: LW3A1 (bolt-action sniper) with a 22x Scope. Pair it with an M9 Pistol for panic moments. The LW3A1 lands one-shot kills to the upper chest and head: at 100m+ it’s an instant delete button. Attachment priority: Suppressor (radar denial), Bipod (increases stability when mounted), 22x Scope. This setup demands high ground, cover, and clean sightlines. It’s not forgiving if you miss, but it’s devastating if you land shots.
Mid-range flex (versatile Recon): DM7 (designated marksman rifle) + Reflex Sight + Vertical Grip + M9 Pistol. The DM7 fires precise bursts at medium range, gives you faster TTK than the LW3A1 if enemies close distance, and rewards accuracy without the reload commitment. This loadout works in more situations, Conquest with varied engagement distances, Rush where enemies suddenly appear close, but lacks the one-tap potential of pure sniping.
Closed-space variation (when spawned on assault-heavy maps): Swap the LW3A1 for the SG-550 (shotgun) and keep the Reflex Sight. Recon with a shotgun is unconventional but viable if you’re defending tight objectives where your drone intel still provides value while you hold rooms.
Gadget setup: Drone for intel (mandatory), Insertion Beacon for aggressive plays or Motion Sensor for passive defense. Grenades: Frag Grenades or Flashbang Grenades (flash helps obscure your position after you shoot from it).
The Engineer Specialist
Engineer is the vehicle-killer and gadget-focused specialist, built to counter armor and support squad utility plays. The signature ability, Sentry Gun, deploys an AI-controlled turret that fires on enemies in its radius, pure defensive presence that holds positions or watches flanks.
The C4 gadget turns you into an anti-vehicle and anti-fortification specialist. Drop C4 on a tank and detonate: watch the carnage. It’s also useful for breaching walls, destroying equipment, and creating explosion chaos in close quarters.
Engineer trades some personal firepower for utility and area control. You’re not as strong as Assault in 1v1s, but your gadgets give your squad massive advantages against vehicles and fortified positions. In vehicle-heavy modes like Breakthrough or large maps like Kaleidoscope, Engineer value skyrockets.
In 2026 meta, Engineer’s C4 damage was nerfed slightly (now requires two charges to destroy a full-health tank instead of one with specific placement), pushing players toward coordinated explosive usage rather than solo vehicle destruction. The Sentry Gun cooldown was also increased, making turret spam less dominant.
Why Choose Engineer?
- Only reliable counter to vehicles without specific launchers
- Sentry Gun provides passive map control
- C4 opens tactical options (wall destruction, equipment denial)
- Weakest in pure gunfighting scenarios
- Essential in vehicle-heavy game modes
Loadout Recommendations for Engineer
Standard vehicle-killer: Assault Rifle (AK-24 or M5A1) paired with C4 and Sentry Gun. Attachments: Vertical Grip, Extended Mag, Reflex Sight. Your gun is secondary to your gadgets: the assault rifle keeps you relevant in firefights but isn’t your main play. Stay with teammates, use C4 to disable vehicles before they wreck your squad, and position the Sentry Gun to cover key lanes.
Anti-air variation: LW3A1 (sniper rifle) + C4 + Sentry Gun. This aggressive setup uses sniping for solo picks while maintaining vehicle destruction capability. It’s harder to pull off than the assault rifle version because you lose close-quarters performance, but if you can snipe, this loadout is disgusting in the right hands. Requires positioning near squad for protection.
Turret-focused defense: Swap C4 for Repair Tool and keep the Sentry Gun. This is a pure defensive play, you repair damage to squad vehicles and fortifications while your turret covers approaches. It’s less flashy than C4 plays but invaluable when holding a flag against waves of attackers. Pair with a medium-range assault rifle.
Loadout attachments for all Engineer variants:
- Muzzle: Suppressor (radar advantage)
- Underbarrel: Vertical Grip (recoil stability)
- Optic: Reflex Sight or 6x Scope (depending on engagement range)
- Magazine: Extended Mag (stay in fights longer)
Grenades: Frag Grenades for area denial, or EMP Grenades if facing Engineer-heavy enemy teams (disables enemy gadgets including Sentry Guns and drones).
Class Comparison: Strengths and Weaknesses
Understanding the tradeoffs between specialists is crucial for picking the right fit for a match’s context and your squad’s needs.
Assault leads in personal survivability and close-range dominance. The self-heal and revive combo makes Assault the hardest to kill 1v1 in CQB. Weakness: falls off hard in long-range scenarios and requires aggressive positioning to generate value. If the map is open (like Orbital) and you’re playing Assault, you’ll struggle against dug-in snipers.
Support excels at multiplying squad effectiveness through sustained supply pressure. A well-positioned Support keeps teams fighting longer and harder. Weakness: personally fragile if caught alone. Support is only as strong as the teammates being supported: in chaotic matches with uncoordinated squads, you’re just a lightly-armed guy holding an ammo box.
Recon dominates extreme range and provides information superiority through drones. Wall-hack intel fundamentally advantages coordinated teams. Weakness: useless in CQB and requires precision aiming and map knowledge to generate value. A bad Recon player contributes almost nothing because they’re hiding in the back getting picked off.
Engineer is the vehicle counter and area-control specialist. C4 solves vehicle dominance, and the Sentry Gun provides passive defense. Weakness: weakest in pure gunplay and least valuable on vehicle-light maps. Drop Engineer on a 32-player Conquest server without helicopters and you’re underpowered.
| Specialist | Best At | Worst At | Squad Dependency |
|---|---|---|---|
| Assault | CQB, Solo kills, 1v1s | Long-range duels | Low (self-reliant) |
| Support | Team sustain, Flag holds | Solo carry, Open maps | High (needs squad) |
| Recon | Intel, Extreme range, Picks | CQB, Disorienting chaos | Medium (benefits from teamwork) |
| Engineer | Vehicle destruction, Area control | Gunfighting, Light-vehicle maps | Medium (situational value) |
Meta insight: in coordinated competitive play, squads run one Assault (pusher), one Support (sustainer), one Recon (intel), and one Engineer (utility). This composition covers every scenario. In uncoordinated pub matches, Assault and Recon are safer picks because their value doesn’t hinge on squad performance.
Best Classes for Different Game Modes
Game mode matchups matter. A class that dominates one mode might be liability in another. Here’s the real meta for each major mode in 2026.
Conquest and All-Out Warfare
Conquest is the ultimate team mode, flags scattered across massive maps demand squad coordination and sustained presence. Support becomes essential here because flag holds drain resources: teams that run out of ammo lose flags. Pair Support with one Assault (pushing into objectives) and one Recon (intel for counter-attacks). Engineer is situational, only bring it if the enemy is running heavy vehicles.
Tactically, Conquest rewards classes that excel in medium-range sustained combat. Assault’s self-heal shines during flag captures, and Support’s ammo drop turns flag-defense into a war of attrition your squad wins. Solo roaming with Recon is viable but less impactful than squad-focused gameplay.
Key map example: Kaleidoscope, tight buildings and 100-150m sightlines make Assault and Support the meta picks. Both can leverage close cover and the clustered objective layout. Recon gets value at specific high-ground positions but isn’t as consistent.
Rush and Fast-Paced Modes
Rush compresses teams into attacking/defending tight objectives, rewarding burst damage and ability cooldown efficiency. Assault becomes dominant, you’re fighting over tight areas, and the Assault’s revive ability plus self-heal creates a sustainable frontline. The TTK advantage in medium-range combat matters immensely when you’re fighting around a bomb site.
Support is still valuable (ammo for defenders, healing for pushers) but less gamechanging than in Conquest. Recon’s drone intel helps with the initial push but loses impact once the fight starts. Engineer is weak in Rush unless the map has vehicle spawns (like the tank in Rush mode on Hourglass).
Target-specific meta: hold the objective as Assault with a self-heal and defibrillators: let enemies come to you. Attack as Assault with grenades and aggressive positioning. If forced to play Support in Rush, focus on keeping your frontline alive rather than staying back.
Breakthrough and Large-Scale Maps
Breakthrough is vehicle-heavy: attackers storm defender positions with helicopter and tank support, while defenders need to slow advances. Engineer becomes mandatory, your C4 and Sentry Gun are the only reliable counters to enemy armor. Pair with one Assault (pushing into breaches), one Support (sustaining the push), one Recon (spotting vehicle spawns).
Large-scale maps like Kaleidoscope or Manifest amplify class strengths and weaknesses. Open terrain favors Recon and Engineer (sightlines, vehicle engagement). Clustered buildings favor Assault and Support. Optimal squad composition: Assault + Support for building holds, Recon for overwatch, Engineer for vehicle deterrence.
For solo gameplay on large maps: Recon is safest, position yourself in elevated positions with clear sightlines, keep your drone refreshed, and let teammates leverage your intel. Assault works if your squad is aggressive: otherwise you’ll overextend.
In chaotic world of Battlefield gameplay: Master Strategies, specialization isn’t optional, it’s how winning teams function. Class selection is your first strategic decision every life.
Specialization Tips and Loadout Customization
Beyond the preset loadouts, customization within each specialist unlocks nuanced playstyles. Here’s how to evolve your class approach once you’ve mastered the basics.
Weapon-First Customization: Your specialist ability is locked, but your weapon isn’t. If you’re naturally good at medium-range engagements, pick your favorite medium-range gun and build your specialist around it. Assault with an SG-550 (shotgun) plays totally differently than Assault with an LW3A1 (sniper). Both are valid: pick based on your accuracy strengths.
According to tier lists on Game8, the current weapon meta favors assault rifles (AK-24 dominates TTK rankings) followed by sniper rifles (LW3A1) and LMGs (M249 for sustained damage). Shotguns (SG-550) are niche picks in close-quarter maps. Your specialist choice shouldn’t override weapon meta: pick the strong gun that fits your range preference, then choose the specialist that supports it.
Gadget Synergy: Some weapon-gadget combos create dirty advantages. Assault with a Gpmg-7 and Frag Grenades becomes a mobile suppression platform. Engineer with C4 and a sniper rifle is a solo vehicle counter. Support with Incendiary Grenades and an LMG locks down corridors. Spend time in Shooting Range testing gadget timings and blast radiuses, you’ll learn the muscle memory to chain them effectively.
Map-Specific Loadouts: Hourglass demands vehicle-savvy (Engineer mandatory). Manifest is sniper heaven (Recon dominates). Kaleidoscope is tight urban (Assault shines). Build two loadouts per specialist (aggressive and defensive) so you can swap when your initial strategy isn’t working.
Ping and latency matter more with some specialists. Assault’s close-range combat is ping-forgiving: a slightly laggy revive still works. Recon’s sniper rifles are ping-sensitive, every millisecond of lag throws your shots off. If you’re playing on high latency, Assault or Support is safer than Recon.
Patch Awareness: Specialization meta shifts with patches. Right now in 2026, Assault’s revive cooldown sits at 20 seconds (buffed from 25 in the last patch), making aggressive revives more spammable. Support’s supply drop cooldown is 30 seconds (nerfed from 25), pushing players toward more tactical usage. Recon’s drone duration is 3 seconds (nerfed hard in early 2026), forcing drones to be intel shots rather than sustained scans. Stay current with patch notes: your effective specialization evolves as the game does.
Resources like Twinfinite’s Battlefield guides and GameRant’s loadout articles break down patch changes and meta shifts. Check them monthly to stay sharp.
Sensitivity Settings: Each specialist benefits from different sensitivity settings. Recon (sniper-heavy) wants lower sensitivity for precision aiming. Assault (CQB-heavy) benefits from higher sensitivity for flick shots. Support (suppression) works with medium sensitivity. Spend time in training modes dialing in sensitivity before jumping into ranked, a poorly configured control scheme will sabotage even a good specialist pick.
Squad Communication: Specialization value multiplies with callouts. If your Recon player drones a position, call it out. If your Support drops ammo, acknowledge it. If your Engineer spots a vehicle, mark it. Dead air means information is wasted. Use voice chat: it’s non-negotiable for competitive play.
Conclusion
Mastering Battlefield 6’s specialist system means understanding not just the four classes, but how they interact within your squad and adapt to specific maps and modes. Assault is your aggressive anchor, Support keeps momentum alive, Recon provides vision, and Engineer counters vehicles. No single class wins games alone, they’re tools in a bigger strategic puzzle.
The meta will continue shifting as patches roll through 2026. Cooldowns will be tweaked, weapon balance will shift, and new strategies will emerge. The fundamentals stay consistent: play your specialist’s strength, adapt your loadout to the map and game mode, and communicate with your squad.
Start by spending time in Training Range with one specialist. Learn the ability cooldowns, practice the gadget timing, and figure out weapon pairings that feel comfortable. Once you’re confident with one specialist, pick another and repeat. Within a few matches, you’ll have a solid grasp of the full roster and can slot yourself into squads that actually need what you bring. That’s when Battlefield stops being chaotic and starts being strategic, and that’s when you start winning.
Now get out there, pick your specialist, and dominate.