Table of Contents
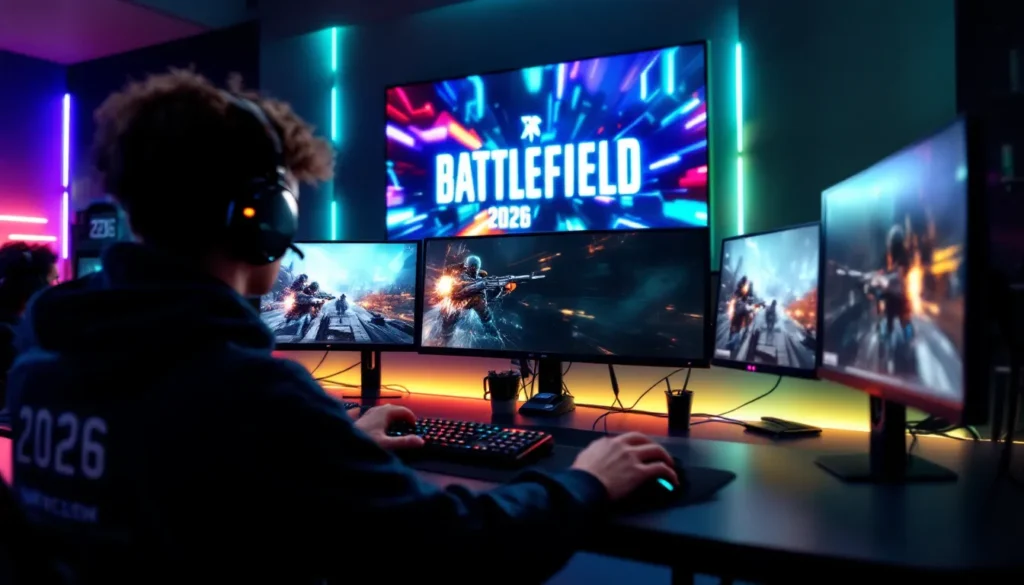
ToggleThe medic class has always been the backbone of any organized Battlefield squad, but in 2026, Battlefield Medical Associates have evolved into far more than just heal-slinging support players. They’re now tactical powerhouses capable of keeping their team alive while maintaining significant offensive output. Whether you’re jumping into casual multiplayer or grinding through competitive tournaments, understanding how to master the combat medic role, and what “Battlefield family medicine” really means in terms of squad cohesion, is essential for climbing the ranks. This guide breaks down everything you need to know about medical loadouts, healing mechanics, and positioning strategies that’ll transform you from a liability into an MVP candidate.
Key Takeaways
- Battlefield Medical Associates are tactical force multipliers who sustain squad health, enable aggressive pushes, and directly impact objective control and team survival rates.
- Optimal medical loadouts balance healing output with combat viability by prioritizing assault rifles and carbines, deployable healing stations, and strategic gadget selection over raw damage.
- Positioning within 5-10 meters of forward teammates while maintaining anticipatory awareness of enemy threat vectors allows medics to provide proactive healing coverage without overextending.
- Revival timing during brief enemy engagement windows (reload cycles, grenade detonations, suppression fire) separates experienced medical specialists from novices and prevents cascading squad eliminations.
- Competitive Battlefield play demands healing-focused perk combinations, constant team communication about cooldown status and threat vectors, and resistance to kill temptation that compromises squad sustainability.
- Professional esports teams allocate dedicated medical associates per squad unit because sustained healing coverage translates to higher objective capture rates, extended teammate survival, and measurable win-rate improvements.
What Are Battlefield Medical Associates?
Battlefield Medical Associates represent the specialized medical support archetype in modern Battlefield titles. They’re not just players who throw health packs, they’re trained squad members equipped with advanced healing technology, revival capabilities, and supportive gadgets that directly impact team performance and objective control.
In competitive Battlefield play, medical associates function as force multipliers. A single well-positioned medic can sustain an entire squad’s push into enemy territory, revive downed teammates before they bleed out, and provide intel through their healing radius awareness. The role demands map knowledge, positioning discipline, and timing awareness that separates casual players from competitive veterans.
The medical specialist class typically features rapid health regeneration tools, portable healing stations, and revival equipment as primary toolkit elements. Different Battlefield titles may vary slightly in mechanics, but the core principle remains: keep your team functioning at peak health so they can focus on eliminating threats rather than managing their HP pool.
The Role of Combat Medics in Modern Battlefield Gameplay
Support Responsibilities and Team Dynamics
Combat medics operate as the pillar holding squad dynamics together. Your primary responsibility extends beyond simply healing damage, you’re managing team morale, resurrection timing, and resource distribution. When teammates know they have reliable healing backup, they play more aggressively, push harder into objectives, and take calculated risks they wouldn’t otherwise attempt.
Your healing output directly translates to squad sustainability. Every point of health you restore is damage your teammates don’t need to retreat to cover to recover. This means longer engagement windows, higher DPS uptime for your squad’s primary shooters, and faster objective captures. Teams with coordinated medics consistently outlast opponents in prolonged firefights because they maintain superior force strength throughout engagements.
Communication forms the backbone of effective medical support. Constant callouts about incoming damage, teammate status, and squad positioning allow you to prioritize heals efficiently. Good medics maintain awareness of who’s critically wounded, who can survive their current engagement, and where the next threat vector originates.
Impact on Squad Survival and Objectives
Objective-based modes like Conquest and Rush become dramatically different when medical support is optimized. A squad without medic support needs to retreat for self-healing, abandoning position progress. A squad with an active medic maintains continuous objective pressure, completing captures faster and defending positions more effectively.
Revival mechanics specifically shift match outcomes in dramatic fashion. Every successful revival represents reclaimed squad strength, essentially two-for-one value since you’re restoring a teammate while keeping enemies from scoring elimination credit. In competitive play, first-blood advantage frequently determines round outcomes. Medical associates directly counter this by enabling rapid resurrection when teammates fall.
Squad survival cascades through multiple mechanics. Healthier teammates take fewer shots to eliminate, meaning enemies expend more ammunition and reveal positions longer. Extended teammate survival increases your squad’s collective skill expression, experienced players stay alive longer and contribute more value than fresh respawns. The cumulative effect amplifies through match duration, turning a single medic’s competence into observable win-rate improvements.
Essential Weapons and Loadout Configurations
Primary Weapons for Medical Specialists
Weapon selection for medics balances healing duties with combat viability. You’re not competing for elimination leaderboard positions, you’re enabling teammates to achieve them. This means prioritizing consistency, reliability, and handling characteristics over raw damage output.
Assault Rifles form the safest primary choice for most medical associates. Weapons like the M16A4 or AK-12 provide balanced recoil patterns, adequate range engagement windows, and sufficient ammo capacity for extended team support sessions. These help self-defense while staying in healing radius of teammates without requiring excessive repositioning.
Carbines and PDWs excel in closer-quarters environments. Tight map corridors and indoor objective areas favor faster-handling weapons where engagement distances rarely exceed 25 meters. The SCAR-H carbine variant trades raw DPS for superior handling without sacrificing lethality at practical medical support ranges.
Avoid sniper rifles and other specialized weapons. Your healing responsibilities demand flexibility to rapidly reposition based on teammate needs. Long-range weapons lock you into positioning patterns that conflict with squad protection requirements.
Gadgets and Equipment That Define Your Playstyle
Primary gadget slots should prioritize healing output and squad sustainability. The Medical Station (deployable healing area) forms the cornerstone of stationary squad protection. Placed strategically around objective points, it automatically heals nearby teammates and provides regeneration rate boosts that outpace enemy damage in many scenarios.
Medical Packs (thrown healing items) enable reactive healing for teammates at distance. Unlike stationary stations, packs grant instant health restoration and allow you to support teammates engaged in forward positions. Mastering pack trajectory and timing dramatically increases healing efficiency.
Secondary gadgets should address squad vulnerabilities based on loadout composition:
- Ammo Supplies compensate if your squad lacks dedicated support specialists
- Tactical Shields provide temporary damage mitigation during medical procedures
- Smoke Grenades enable revives in dangerous positions by obscuring enemy sight lines
- C4/Explosives allow medics to actively contest objective control rather than remaining passive
Selectivity matters here, carrying too many utility items dilutes your core medical functionality. A focused loadout with optimized healing gadgets outperforms jack-of-all-trades configurations that compromise healing capacity.
Advanced Healing Mechanics and Revival Techniques
Maximizing Healing Output in High-Pressure Situations
Healing output scales with positioning precision and timing awareness. Medical associates often misjudge healing window opportunities, throwing packs at full-health teammates or deploying stations in positions where teammates can’t benefit before engaging enemy forces.
Optimal healing sequences prioritize teammates by vulnerability rather than proximity. A teammate at 25% health actively engaged in combat receives higher healing priority than a 60% health teammate in covered position. This prevents teammate eliminations that would remove squad strength during critical moments.
The Medical Station placement requires strategic foresight. Positioning stations near objective control points (flags in Conquest, bomb sites in competitive modes) ensures teammates naturally pass through healing radius while progressing objectives. Avoid placing stations in isolated areas, healing output means nothing if teammates never occupy that space.
Revival timing separates experienced medics from novices. Attempting revives during active firefights frequently results in medic elimination, removing all healing support from the squad. Wait for brief engagement windows, enemy grenade detonations, reload cycles, or teammate suppression fire that forces enemies into cover. These 2-3 second windows provide sufficient time for successful revives without exposing yourself to concentrated fire.
Revival range management requires understanding your medic’s revive radius. Most medical specialists feature 8-12 meter effective revive ranges. Positioning slightly ahead of teammate positions ensures you can quickly revive fallen players without advancing excessively into danger zones.
Strategic Positioning for Effective Support
Medical associates thrive in “supporting distance”, close enough to provide healing coverage but sufficiently removed from primary engagement lines to maintain survival longevity. This typically translates to 5-10 meters behind forward teammates, positioned where you observe approaching threats while maintaining line-of-sight for healing pack tosses.
Map control determines positioning flexibility. Open-field maps demand more aggressive forward positioning to maintain squad healing coverage throughout extended advances. Urban maps with narrow corridors allow medics to occupy protected positions where single entry points provide defensive advantages.
Vertical positioning considerations often go overlooked. Elevated positions provide superior awareness of teammate locations and incoming threats without constantly repositioning. Rooftop or second-floor locations transform medics into squad oversight roles rather than frontline combatants, a positioning archetype that rewards map knowledge and long-range communication.
Anticipatory positioning makes the difference between reactive and proactive medical support. Position yourself where teammates will retreat when taking damage, not where they currently stand. This requires predicting enemy approach vectors and teammate response patterns. Competitive players unconsciously recognize high-damage threat corridors and reposition defensively, positioning your medical station along these predictable retreat paths maximizes healing utility.
Specializations and Perks That Enhance Medical Performance
Tier-Based Advancement and Talent Trees
Modern Battlefield titles carry out specialization trees that allow medical associates to customize their support capability. These tier-based advancement systems reward strategic perk selection that synergizes with your playstyle and squad composition.
Healing enhancement perks form the foundation of most medical builds. Selecting perks that increase healing pack effectiveness, reduce gadget cooldown timers, or expand medical station radius directly amplifies your core functionality. These represent safe, reliable perk selections that improve baseline medical performance regardless of engagement circumstances.
Movement and survivability perks address medic vulnerability during healing actions. Perks reducing incoming damage while healing teammates, increasing movement speed when carrying medical supplies, or enabling temporary shield generation during revives prevent medics from becoming free eliminations while supporting teammates.
Mobility specializations enable medics to maintain positioning discipline during chaotic engagements. Perks that reduce fall damage, increase sprint duration, or enable faster equipment deployment allow you to rapidly reposition based on squad needs without sacrificing healing capability or survival prospects.
Tier progression typically allows three perk selections per loadout. Competitive players generally allocate two perks toward healing amplification and one toward personal survivability, the 2-1 split ensures sufficient healing output while preventing medic eliminations that handicap entire squad performance.
Building Synergistic Perk Combinations
Effective perk selection requires recognizing interaction patterns between specializations. Certain perks amplify each other, creating multiplicative benefits that exceed their individual contribution values.
Example synergy: combining a healing radius extension perk with a cooldown reduction perk creates medical associates capable of maintaining near-continuous healing coverage across larger areas. These combined perks enable squad positioning flexibility that single perks cannot achieve.
Another synergy pattern: damage reduction while healing paired with increased revive speed allows medics to maintain focus on teammate support during dangerous revive situations. When enemies realize they cannot pressure medics effectively during revives, teammates gain confidence that downed allies will return to combat rather than respawn.
Avoid perk redundancy. Selecting multiple perks addressing the same function wastes specialization slots. If you already feature superior healing radius through equipment selection, redundant radius-extension perks provide diminishing returns compared to specializations addressing different team needs.
Tier structure variation means competitive balance shifts between seasonal patches. Top-tier competitive teams remain adaptable, switching perk combinations based on current patch notes and meta shifts. Mobalytics competitive guides frequently update tier lists reflecting current specialization viability, providing reliable perk selection frameworks during transitional balance periods.
Teamwork Strategies: Coordinating With Your Squad
Communication and Map Awareness
Ineffective medical associates play silently, healing whenever they notice teammate damage. Exceptional medics maintain constant communication, predicting threats before teammates recognize danger. Verbal callouts about incoming enemy positions, low-health teammates requiring immediate healing focus, and equipment cooldown status transform squads from reactive to proactive units.
Micro-communication forms the foundation: “healing focused on you right now,” “revive incoming,” “station placed at flag.” These brief callouts maintain teammate awareness of medical support availability without cluttering voice comms. Clear, concise information helps teammates make decisions based on current healing status rather than guessing support capability.
Map awareness extends beyond visible threats. Experienced medics maintain mental models of teammate positions across the entire squad, not just those in immediate visual range. This awareness enables anticipatory healing, positioning near upcoming teammate locations before damage occurs rather than reacting after teammates start taking fire.
Radar and minimap interpretation provides foundational map awareness. Identifying teammate positions through minimap markers allows medics to plan healing station placement and positioning before engagements begin. Teammate clustering around objective points indicates where healing concentrations will prove most valuable.
Threat vector prediction separates competitive medics from average players. Recognizing enemy approach angles from your team’s objective control position allows you to position healing and revive capabilities along predictable engagement lines. This anticipatory positioning transforms reactive support into proactive squad sustainability.
Positioning Yourself for Maximum Squad Support
Squad positioning forms a triangle or clustered formation where medics maintain central positioning relative to teammates. This allows consistent line-of-sight to all teammates without excessive repositioning during active engagements.
Offset positioning prevents concentrating your team around obvious medic locations. When enemies identify your medical associate’s position, focusing fire on the healer removes squad sustainability. Maintaining slight position separation from your primary damage dealers forces enemies to divide attention rather than eliminating your medical advantage first.
Flanking consideration creates vulnerability for medics. Never position yourself where enemies can approach from unexpected angles while you’re focused on teammate healing. Ensure squadmates can cover flanking approaches while you concentrate on healing management.
Dynamic repositioning during objective transitions prevents predictable positioning that allows enemies to pre-position for medic elimination. When your squad shifts from one objective to another, adjust your positioning rather than maintaining static healing station placement. Enemies recognize static positions and plan accordingly, mobility denies them targeting advantage.
Cover positioning matters immensely. Position behind solid objects (walls, crates, vehicles) where you can peer around corners to deliver healing pack tosses without exposing yourself to sustained fire. This cover-based positioning allows extended healing sessions without accumulating lethal damage.
The Loadout competitive breakdowns frequently feature squad positioning diagrams that illustrate optimal medic placement for various Conquest flag layouts. These visual guides provide reference frameworks for understanding how professional teams structure squad positioning around medical support roles.
Common Mistakes Medical Players Make and How to Avoid Them
Overextending for kills represents the most frequent medic mistake. Competitive pressure to pad elimination statistics tempts medical associates to advance beyond squad protection range, abandoning healing responsibilities for offensive engagements. This single mistake cascades, your squad loses healing support, increases vulnerability, and frequently results in cascading teammate eliminations. Resist kill temptation. Your value generates from enabling teammate kills, not personal elimination counts.
Stationary healing stations placed in predictable locations telegraph your position to observant enemies. Avoid placing stations in obvious coverage points or bottleneck locations where enemies expect them. Deploy stations slightly offset from main squad positions, close enough for healing radius coverage but sufficiently displaced that enemies can’t efficiently target your medic position through station placement inference.
Failing to move healing stations during extended engagements wastes already-deployed healing resources. When squad positioning shifts, previously placed stations become irrelevant. Move between engagements, reposition stations based on new objective positions, and maintain healing coverage alignment with current squad location.
Attempting revives without clearing surrounding threats converts revive attempts into simultaneous teammate eliminations. Always ensure immediate areas around downed teammates contain no active threats before committing to revival. One brief moment of enemy attention focus during revive windows frequently results in medic deaths that compound original teammate elimination into cascading squad strength loss.
Neglecting personal loadout optimization undermines medical performance. Carrying weapons unsuited for your engagement ranges, selecting perks that don’t enhance healing capability, and equipping gadgets misaligned with squad composition all reduce your effective support value. Optimize loadouts based on map characteristics and squad role diversity.
Ignoring squad composition prevents optimal medical support allocation. Different squad builds require different medical focuses. Squads heavy on aggressive assault specialists benefit from forward-positioned healing coverage. Squads emphasizing ranged specialists thrive with stationary station-based healing. Adapt your medical approach based on teammate specializations.
Tunnel vision on individual teammates prevents optimal healing distribution. Some players attract disproportionate damage through positioning mistakes or aggressive plays that exceed their actual durability. Allocate healing based on strategic value and sustainability potential, not personal favoritism. A sharpshooter in a strong defensive position deserves healing priority over an assault specialist making repeated aggressive pushes that end in eliminations regardless of healing support.
Competitive Play: Medical Associates in Esports and High-Tier Lobbies
Professional Battlefield esports has fundamentally reshaped how competitive squads approach medical support. Gone are the days when medics received minimal spotlight, top competitive franchises now feature dedicated medical specialists commanding substantial respect and strategic planning.
Competitive squad compositions typically allocate one guaranteed medical associate per four-player unit, with larger formats sometimes featuring two. This reflects medical support’s strategic importance at the highest competition levels. Professional teams invest significant scrim time perfecting medical positioning, squad movement patterns around healing coverage, and revival timing during high-pressure tournament moments.
Revival timing becomes art form in competitive play. Professional medics execute revives during microsecond windows that casual players never recognize. Enemy reload cycles, grenade detonation recoveries, and teammate suppression fire create momentary windows where revives succeed without medic exposure. Executing these split-second timing decisions separates tournament-winning squads from first-round eliminations.
Gadget selection differs dramatically between casual and competitive play. Professional teams prioritize healing stations over alternative gadgets, recognizing that sustained squad health translates to objective control advantages. Equipment placement follows predetermined callouts established through extensive scrim practice, allowing medics to efficiently coordinate positioning without constant verbal clarification.
Position predictability becomes liability in competitive contexts. Opposing teams develop strategy specifically targeting identified medic positions. Superior competitive medics maintain positioning unpredictability, never occupying the exact same location twice, preventing enemy prediction and pre-positioning. This dynamic positioning creates difficulty for coordinated opposing teams attempting to eliminate healing support.
Cooldown management reaches obsessive precision in competitive play. Professional medics track exact equipment cooldown timers, understanding when equipment returns available and timing repositioning around cooldown windows. A single delayed medical pack or poorly-timed station placement creates cascade failures in squad sustainability.
Healing efficiency metrics occupy significant competitive discussion. Healing-per-minute (HPM) and successful revival percentages directly correlate with squad performance. Tournament analysis frequently highlights medical associates whose healing output exceeded 300 HPM while maintaining sub-3% death rates, the perfect statistical balance representing both support value and survival discipline.
Destructoid esports coverage regularly features post-match analysis highlighting pivotal medical moments that determined tournament outcomes. These breakdowns showcase how professional-level medical support separates championship-contending organizations from competitive pretenders. Reviewing professional medical gameplay provides concrete examples of advanced positioning, timing execution, and communication patterns that elevate competitive capability.
Conclusion
Mastering Battlefield Medical Associates requires commitment to squad-first mentality that contradicts natural elimination-focused competitive instincts. The healing specialists who achieve greatest impact willingly sacrifice personal statistics for teammate sustainability, understanding that enabling four squadmates’ elimination productivity vastly outweighs any personal elimination count. This perspective shift, from individual performance to squad multiplier value, represents the fundamental distinction between average support players and exceptional medical associates dominating competitive environments. Your healing output, revival timing, and positioning discipline directly determine whether your squad maintains advantages during extended engagements or gets slowly eliminated through unsustained damage accumulation. The strategies outlined here provide frameworks for systematic improvement, but your growth accelerates through intentional practice, squad communication, and willingness to adapt medical approaches based on current match circumstances and evolving competitive meta shifts.